
INTERIOR FINISH: Residential and commercial plastering
FREQUENTLY ASKED QUESTIONS - HOMEOWNERS
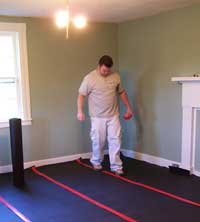 |
Bart lays down tar paper to protect wood floors in a historic home |
|
The two coat veneer plaster finish has the look of luxury |
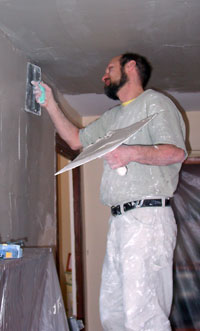 |
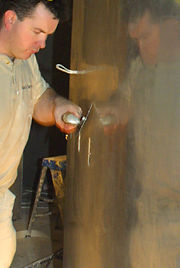
Sam
repairs a cracked plaster wall in a historic Connecticut home. |
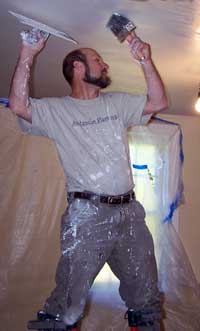 |
Sam water trowels a ceiling. |
Q: I've got an old home. The original wood lath plaster is beginning to crack and sag. What do you recommend?
A: If the plaster has not yet fallen off, it can be restored.
You gain a lot by saving the original plaster, because it varies greatly in thickness to allow for flat surfaces over framing that is often irregular. If you simply sheetrock over the existing framing you may have some very wavy, crooked walls. Joint compound goes on too thin to straighten and flatten the surfaces.
If you were to remove the old lathe and plaster, you would have to correct the framing by either sistering the framing members with all new pieces, or strap and shim the existing framing. Either solution is costly.
Also some homes built between 1880 and 1940 may have asbestos fibers in the base coat plaster.
For more information, see resurfacing and repair process.
Q: Why does plaster fail?
The most common reasons for plaster failure in walls or ceilings are a finish coat that loosens, deterioration of brown or finish coats, or loosening of lath, brown and finish coats. Most plaster failures are due to moisture problems like a roof that leaks over a long period of time, or to faulty workmanship. In the past, too much sand was used in scratch and brown coats to save money, because sand is relatively inexpensive relative to plaster. This leads to failure.
Q: How much will it cost?
A: Conventional plaster is significantly more expensive than veneer because it is labor intensive.
Every job is different. To estimate cost, we need to come out to the job site to evaluate your specific situation and needs. We will prepare a written cost estimate for you at no charge.
Q: What's the difference between sheetrock + tape vs. blueboard + skim coat plaster?
A: Plaster can be applied to almost any thickness. As a result, it is flatter and more straight. It is also more durable, and abrasion resistant. It won't come apart when wallpaper is removed.
Q: Do you do sheetrocking?
A: Not usually. It will be more cost effective for you to do it yourself, or to hire a sheetrocker. We can recommend a contractor, or you can check the yellow pages for contractors near you. We can tell you what to look for (e.g., avoid seams over doors and windows as they are prone to cracking.)
Q: How should a room to be plastered be prepared?
A: Have the room sheet rocked with blue board (not to be confused with green board.) The sheets should be fastened with 1&1/4" coarse thread drywall screws. Do not mud the board and do not install any corner beads - we handle all that.
Q: What is the difference between veneer, skim coat and conventional plaster?
A: Skim-coat involves one to three coats. We usually do a minimum of two coats. The plaster goes on top of sheetrock or blueboard (sheetrock covered with special paper.) Read more about veneer plaster in Fine Home Buildingmagazine.
Conventional plaster goes over wood or wire lath. It is typically a three coat process. It may be used for curved surfaces, or for older institutional buildings.
Some contractors use less expensive veneer single-coat plasters that go on quickly, but are more likely to crack or blister.
Q: Are there any special requirements for painting or wallpapering plaster?
A: Plaster is alkaline, and takes some time to cure.
- Painting: Paint manufacturers recommend waiting 30 days. It needs to be good and dry. If you are going to paint within 30 days, we recommend starting with either oil-based or shellac-based primer, which is best to block moisture. Some people use an alkaline-resistant primer.
- (Note: Home Depot and other hardware stores sell a white-pigmented shellac primer made by Zinsser (called Ultra Performance B-I-N in a red and white can.) Some paint stores recommend a flat Masonry Primer. Polyvinyl acetate (PVA) primers should never be used over a plaster finish, as they will cause bond loss and paint delamination.
- After 30 days there are no special requirements. Our surfaces are left very smooth and polished.
- Do not sand the plaster - it is not necessary to make the primer adhere. Sanding will only mar and weaken the hard-packed and polished surface.
- Wallpapering: Plaster must be completely dry before installing wallpaper. Once dry, an acrylic primer/sealer should be used before putting up wallpaper.
Q: What do you need at the job site?
A: Just a source of clean, fresh water, electricity and access. For plaster work, ideal interior temperatures are 55 - 70°F both day and night. Ventilation to properly set the plaster during and after application is also important - we use large fans. Keeping windows slightly open helps moisture-bearing air move out, and ensures a hard finish.
Q: What should we do to do to prepare our home before you come out?
A: We can work fastest if the room is clear of furniture. If we are doing a ceiling, it is helpful to remove light fixtures and tuck wires into the box. We will take care of protecting your floors, walls and woodwork.
Q: We have expensive, fancy (cabinets/floors/wall paper). What do you do to protect them during plastering?
A: We emphasize good work practices. We put down drop clothes of roofing paper to protect floors. Wallpaper, walls where plastering is not being done, and doorways are covered with plastic to protect them from dust. Cabinets can be covered with a styrofoam.
Q: How long will it take?
A: It depends on the work that is being done. Small repairs can take as little as two hours. The minimum amount of time for any plaster finish resurfacing job is two days, to allow for site preparation, overnight curing, and clean-up. We make it a priority to finish jobs before the weekend.
Q: What do we need to do once the work is done?
A: In the winter months, it is good to keep the humidity is up in the first 48 hours of plaster curing. Overly rapid drying could cause some cracks. It is also important to prevent the plaster from freezing during that period of time. Try to keep temperatures from 55 - 70°F both day and night.
Contact us:
Phone: 860.334.4816
Email: getplaster@aol.com
Address:
5 Cranberry Dr.
Uncasville, CT 06382-2006
All rights reserved. ©2005 Avalanche Plastering LLC
If you experience difficulties viewing or have questions about the website please contact the webmaster.
Web design by Chimalis LLC